Creating Projects
Create a project to collaborate with your team and give the AI shared context across many conversations. By default every Member, Executive, and Admin can create a project. The person who creates a project becomes its Owner.
Before You Start
You only need two things to get going:
- A short name that says what the work is.
- Optionally, a sentence or two about what you want to achieve.
Everything else — conversations, files, members, memory — is added after the project exists.
How to Create a Project
- Click Projects in the sidebar.
- Click the New project button at the top right of the Projects page.
- If you don't have any projects yet, click Create your first project in the middle of the page instead. Both buttons open the same window.
- The Create a new project window opens.
- Fill in the two fields (see the table below).
- Click Create project.
Creating projects is a permission. If your role doesn't include it, the New project and Create your first project buttons are not shown — ask your admin.
When the project is created you'll see a Project created message and Arketic takes you straight into your new project.
If something goes wrong you'll see a Failed to create project message and the window stays open, so nothing you typed is lost. Check your connection and try Create project again.
The Create Project Fields
The two fields are written as questions rather than as plain labels.
| Field | What it means | Required | Limit |
|---|---|---|---|
| What are you working on? | The project name. This is what you and your teammates will see on the project card and in the project header. Example placeholder: e.g. Marketing Campaign Q1 | Yes | Up to 200 characters |
| What are you trying to achieve? | The project description — the goal of the work. Placeholder: Describe the goal of this project (optional) | No | Up to 2,000 characters |
The Create project button stays greyed out until you type a name. The description is genuinely optional — you can leave it empty and still create the project.
Both fields stop accepting characters once you reach the limit, so you can't accidentally lose text by typing past the maximum.
Buttons in the window
| Button | What it does |
|---|---|
| Create project | Creates the project and opens it. Disabled while the name is empty. |
| Cancel | Closes the window without saving anything. |
You can also close the window with the ✕ in its top-right corner, by pressing Esc, or by clicking the dimmed area outside the window.
Finding Your Projects
All the projects you own or belong to are listed on the Projects page.
Search
Above the project cards there's a search box with the placeholder Search projects.... Start typing and the list filters as you type. Search looks at both the project name and the description, and it ignores upper/lower case — so a project described as "Q1 launch plan" will be found by typing launch.
Because search also covers descriptions, a good description makes projects much easier to find later. It's worth filling in.
If nothing matches, the page shows No projects match your search with a Clear search button.
Archived projects
Next to the search box is an Archived button. Click it to switch the list to the projects that were archived; click it again to go back to your active projects. Search works in both views. See Archiving a Project for what you can do there.
Empty state
If you haven't created or been added to any project yet, the page shows No projects yet, the line "Create your first project to organize your work", and a Create your first project button.
What a Project Card Shows
Each project appears as a clickable card. The card shows:
| Element | When it appears |
|---|---|
| Project name | Always |
| Description | Only if you entered one |
| Updated {time} | Always — for example "Updated Just now", "Updated 5m ago", "Updated 3d ago" |
| Conversation count | Only when the project has at least one conversation |
| File count | Only when the project has at least one file |
| Member count | Only when the project has more than one member |
A brand-new project's card shows just the name and Updated Just now. The counts are not shown as zeros — they appear as soon as there's something to count.
Click anywhere on a card to open that project.
After Creating a Project
Your new project opens straight away. From here you can:
- Start a conversation — type in the box at the top left of the project and send. The conversation is attached to the project and is visible to everyone in it.
- Add files — upload documents so the AI has the background it needs.
- Write instructions — as the Owner, add guidance the AI should follow in every conversation in this project. See Project Instructions.
- Invite members — bring colleagues in. See Project Members.
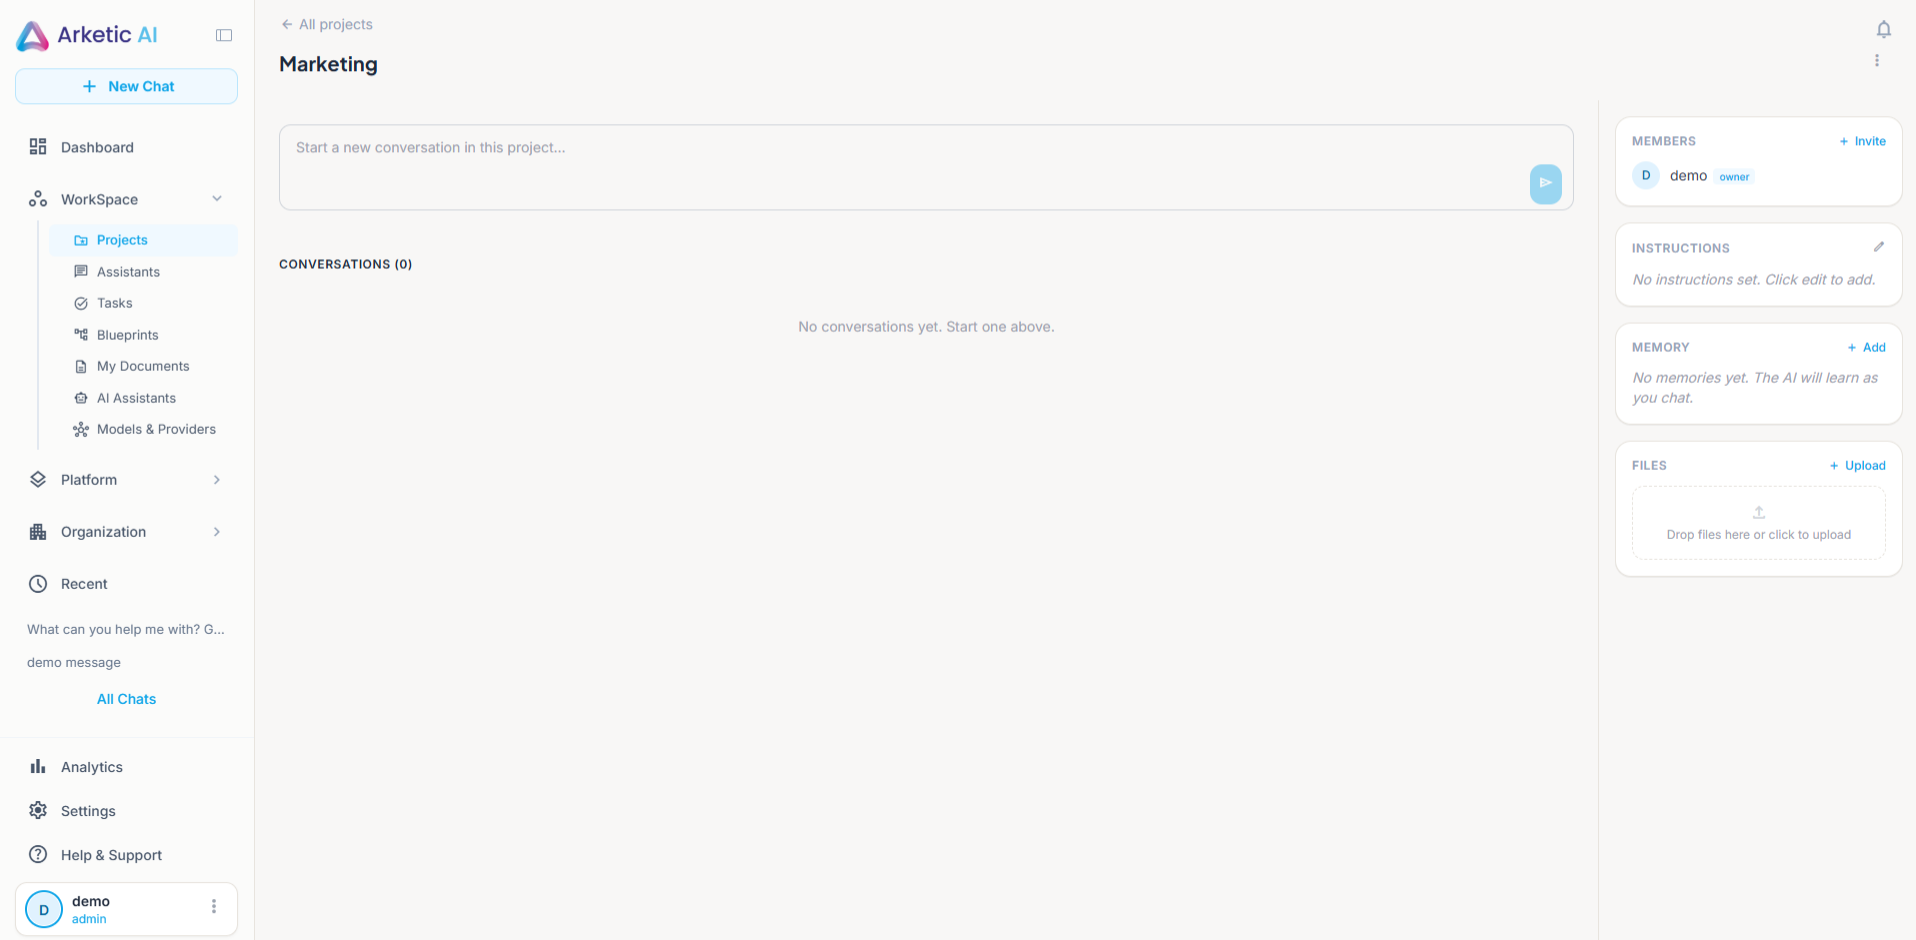
The All projects link at the top left takes you back to the list at any time.
For a full tour of everything inside a project, see Projects Overview.
Changing a Project Later
Rename a project or change its description
- Open the project.
- Click the ⋮ (three dots) button at the top right of the project header.
- Click Edit details. The name and the description in the header become editable.
- Change the name (up to 200 characters) and the description (up to 2,000 characters). The name can't be left empty.
- Click Save. To leave without changing anything, click Cancel or press Esc.
A Project updated message confirms the change.
Everything else
| You want to change | How |
|---|---|
| Guidance the AI follows in this project | Edit the Instructions section in the project (Owner) |
| Facts the project remembers | Add, edit or delete entries in the Memory section (any member) |
| Files | Upload or remove files in the Files section (any member) |
| Who's in the project | Use Invite in the Members panel (Owner) |
The ⋮ menu is shown to the project's Owner, and to project members whose system role is Admin or Executive. Other members don't see it.
Archiving a Project
When a project is finished, the Owner can archive it. There is no "delete" action — the action you'll see is Archive project.
- Open the project.
- Click the ⋮ (three dots) button at the top right of the project header.
- Click Archive project.
- In the Archive project? window, click Archive.
You'll see a Project archived message and you're returned to the Projects list.
Archiving hides the project from the Projects list for everyone in it. Nothing is deleted: the conversations, files, memory, and members are kept, and the project can be brought back.
Archive project appears in the ⋮ menu only if your role includes archiving projects. The standard roles do.
Restoring an archived project
- Open Projects.
- Click Archived next to the search box. The list switches to archived projects.
- Click Restore on the project's card.
A "{project name} restored" message confirms it, and the project is back in your normal list. Click Archived again to switch back to it.
An archived project can't be opened until it is restored — its card only offers Restore. Restoring is for the project's Owner, or a member whose system role is Admin or Executive; if someone else tries, a "Failed to restore {project name}" message appears and nothing changes.
When nothing is archived, the view shows Nothing in the archive — "Projects you archive land here, and you can restore them from this view."
Tips
- Name projects clearly — "Q3 Budget Review" is easier to spot in a long list than "Project 1".
- Write the description — it explains the goal to teammates and makes the project findable through search.
- One project per initiative — keeping unrelated topics apart keeps each project's conversations, files and memory focused.
- Add files early — uploading the key documents before you start chatting gives the AI the background it needs from the first question.
- Set instructions early — if there's a tone, format or rule the AI should always follow for this work, put it in Instructions once instead of repeating it in every conversation.
Related Pages
- Projects Overview — what's inside a project and who can do what
- Project Members — adding colleagues to your project